Custom Plugin Fields in Virtuemart 2
Part 1. Installing and Using Custom Plugin Fields
 In an earlier article we looked at simple custom fields in Virtuemart 2. We will now look at custom plugins. We are dividing this survey into two parts: this part will look at installing and using Virtuemart custom plugin fields, with particular attention to the stockable variants plugin. The second part of the survey, to be published in a separate article, will look at programming custom field plugins in Virtuemart 2, and is mainly aimed at programmers, however others may find it useful as an overview of how custom plugins work.
Custom Plugins
Custom plugins (also known as product plugins) are used to add extra functionality to the Virtuemart product. There are three custom plugins that are distributed with Virtuemart: the specification plugin, which allows you to create searchable custom specifications for a product; the stockable variants plugin, which allows you to display child products as variants that are selectable in the parent product add-to-cart button; and the text input plugin, which allows the customer to add their own customized text when ordering a product.
Using a Custom Plugin
Custom plugins, like all Virtuemart plugins, are also Joomla plugins, and to use them you must first upload and install them using the Joomla installer, then enable them in the plugin manager. Then you need to switch to the Virtuemart and go to products->custom fields, then click the 'New' to start creating a new plugin field which you will later attach to your products.
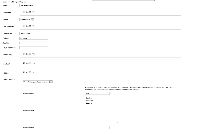
You will see a list of parameters. You need to set the Custom Field Type parameter to 'plugin'. You should then see a select box appear at the bottom of the list labelled 'Select a plugin'. You should see your plugin listed, if not, you have probably forgotten to enable it. Select your plugin type, when you have done so you may now see appear some parameters specific to the plugin - set these as you require. Going back to the top of the parameters list, you should also set a title for the plugin, this is the name of the field that will be displayed in the product editor and on the product page, so make it informative. Whether or not 'Cart Attribute' is set to no or yes will depend on the plugin. Plugins that in some way modify the add-to-cart operation, which is probably most of them, will have this set to yes, but you may need to check the plugin documentation. Remember to set 'Published' to yes. You should leave 'Default' alone, this value may be important to the correct functioning of the plugin, and once you have saved the parameters it should be set automatically to the system name of the plugin. You can leave the other parameters alone for now, though you can add a description if you want. Click 'Save and close' when you are finished.
Now you are ready to use the new field with your products. Open up a product in the product editor and click on the 'Custom Fields' tab. Just as with ordinary custom fields you attach a new custom plugin field by selecting it, then setting its options. The difference with plugin fields is that they generally include more complex behaviours.
You can attach the custom plugin field to as many products as you require.
Example: the Stockable Variants Plugin
The stockable variants plugin allows you to treat child products as variants which can be selected in the add-to-cart functions of the parent product. You can achieve a somewhat similar effect with a simple string field type by creating a list, as described in a previous article, so it is worth considering whether you actually need to use the stockable variants plugin, because it is more complicated to set up. However the advantage of the stockable variants plugin is that it does allow you to track stock levels for the child products. Children whose stock level has fallen to zero will not be displayed as options in the cart. Moreover the plugin does allow you to set up complex multi-dimensional attributes for products (such as size and color), and to check stock levels for the combination of attributes, so that only those combinations that are in stock are displayed.
Usage
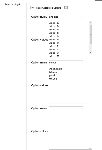
Install the plugin as described above, and create a new instance by going to products->custom fields and clicking the 'New' button.. Select 'plug-ins' as the 'Custom Field Type', and in the 'Select a plug-in' box that appears at the bottom, choose 'VM Custom, stockable variants'. You should now see a set of pairs of text boxes for the option names and values. In our example we will look at creating a simple 'Size' attribute, that can take the values small, medium and large, with a child product assigned to each value.
So in the first 'Option name' text box, put 'Size'. In the first 'Option values' text box put:-
Small
Medium
Large
with one value per line. There are also some other parameters you must set up, once you have finished with the options. For the other custom field parameters put 'Choose a Size' for the title. Set 'Cart Attribute' to 'yes', and the same for 'published'. Then click 'Save and Close'.
Now we are ready to attach the new field to one or more products. Open up a product in the product editor, and click on the 'Custom Fields' tab. From the 'Custom Field Type' select box, select the 'Choose a size' field.
Child Products
Now you need to create some child products to attach to the available options (small, medium and large). In theory you can do this from the parameters of the custom field, but this process is a bit buggy. It is more reliable to click on 'Save and Close' at this point, and create some child products via the Virtuemart products list.
Creating Child Products
In the Virtuemart products listing, click the checkbox next to the parent product name, and click the 'Child Product' button. This will open a new product editor for a child product. You can leave most of the information for the product blank, but give it an informative name such as 'Shirt size small', it is also helpful to give it a SKU, and you need to set the number in stock (on the product status tab). You can leave the price at 0, the price will be set through the custom field parameters later. Then save and close.
Once you have returned to the product listing you can find the parent product listed, it should have '1 children' in the 'product has children' column. Now you can click on this, which should open a listing for the child products. Again you can click on the 'Child Product' button, and add a child product which will store the stock information for the medium size, do the same for the large size.
Attaching the Children to the Product Variants
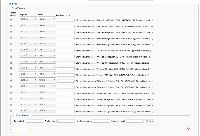
Once you have the 3 children set up, it is time to return to the parent product - you should see the link for this above the child product lists. Re-open the custom field tab. For the 'Choose a size' field you should now see the 3 children listed. All that is required now is to select the size option from the select box which is attached to each product, and set the custom price (additional charge) which will be applied for the option. This will be in addition to the price for the parent product. So if your basic price for the smallest option is £15, £25 for the medium size and £35 for large, you may set this up by setting the price of the parent product to £15. Then the additional charge for the small size will be zero, for the medium size it will be £10, for the large size it will be £20.
You also need to make sure that the 'Parent Variant' box is checked for each option, so that all the options are displayed in the cart. Now save and close the product. If you navigate to the product in the front end of the site you should now see that a select box is displayed next to the add to cart button. As the selected option is changed the displayed price should automatically update.
Further Points
There is not an easy way to re-order child products, and the options are displayed ordered by the id number of the attached child product, therefore the earliest created is displayed first. So it makes sense to create them in the order that you want to display them, for example the small size first. If you want to change the ordering the only way to do this is to edit the child products themselves, and swap all the information around. For example if you have the medium and small sizes displaying in the wrong order you will need to rename the medium child product to 'small' and vice versa (remembering also the swap the SKU and stock information). Then change the options they are attached to on the parent custom field tab. Not a quick process.
Deleting an option is quite easy though, you can just delete the child product. Alternatively you can uncheck the 'Parent Variant' box on the parent custom field tab to keep the child product defined but not have it displayed in the add to cart selection box.
Multi-dimensional Options
Setting up multi-dimensional options is done through much the same process. For example, imagine instead of just a size option we want customers to be able to choose both size and colour. Then when creating the custom field in addition to our size options we create a second list of options. In the second option name box put colour, and in the second option values box list the possible colours, one per line.
You will need to create a child product with stock levels for each size and colour combination. Now when you open the custom field tab for your parent product and select the size/colour plugin field, you should see select boxes for both the size and colour options. Again it is just a matter of attaching the correct options to each child product and setting any additional charges.
When the parent product is viewed in the front end of the site there should be select boxes for both size and colour.
Now the power of product variants should also be apparent, because only those combinations of size and colour which are actually in stock should be selectable. For example suppose your large size is only available in pink, whereas the small and medium are available in white, green or pink. If the customer selects 'large', then only the pink option will be selectable, but if she selects small or medium she will see a choice of white, green or pink. This is not something that can be achieved with a simple custom field.
However if you have a lot of size and colour combinations then it can rapidly become very tedious trying to create all the necessary child products by hand. You will probably want to look at creating the child products programmatically, for example by creating them as rows in a CSV spreadsheet and then importing them directly into Virtuemart. There are several extensions listed in the Joomla extensions directory that will do this for you. Then all you will need to do by hand is to attach the children to the options of the stocakble variant plugin, which is quite a quick process.
Other Plugins
I hope that this has provided a useful overview of using Virtuemart custom plugin fields. I have concentrated on the stockable variants plugin because this is the most difficult to set up, usage for other plugins is very similar, but without the complications involved in setting up child products. You simply define the custom field type in the custom fields manager through the process described above then attach it to a product on the custom fields tab, setting any parameters that are required.


